
Trouble viewing images? Click on images to enlarge.
Article Goal: Send multiple commands / arguments through post processing.
In this article we are going to cover how to send multiple commands / arguments in the post processing section of creating a Job. If you are unfamiliar with post processing commands, check out our article on post processing for more information.
Why Send Multiple Commands?
Some Jobs may require multiple commands during the Job execution. For example, maybe you want to copy a file to multiple locations. Maybe you want to copy a file to one location and delete another file from a different location. All of these examples would require sending multiple commands.
Where Can You Send Multiple Post Processing Commands?
You can modify the post processing commands for a Job in the Job section of the Scheduler for VDM. This can be done using the Add/Edit Wizard or the property window on the right side of the Job creation.
How To Send Multiple Command Line Commands.
(Key Step: 4) Enter post processing commands separated by an ampersand ( & ).
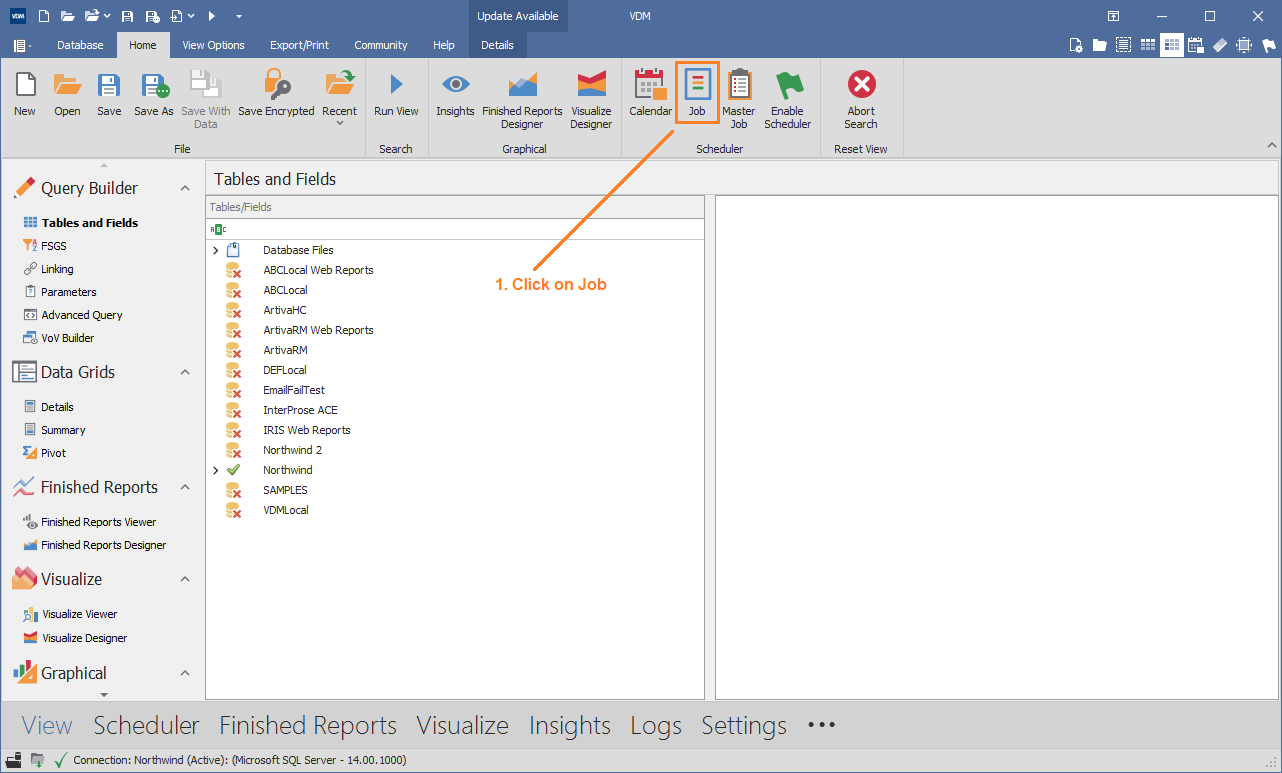
1. Click on the Job located in the Scheduler section of VDM's main ribbon bar.
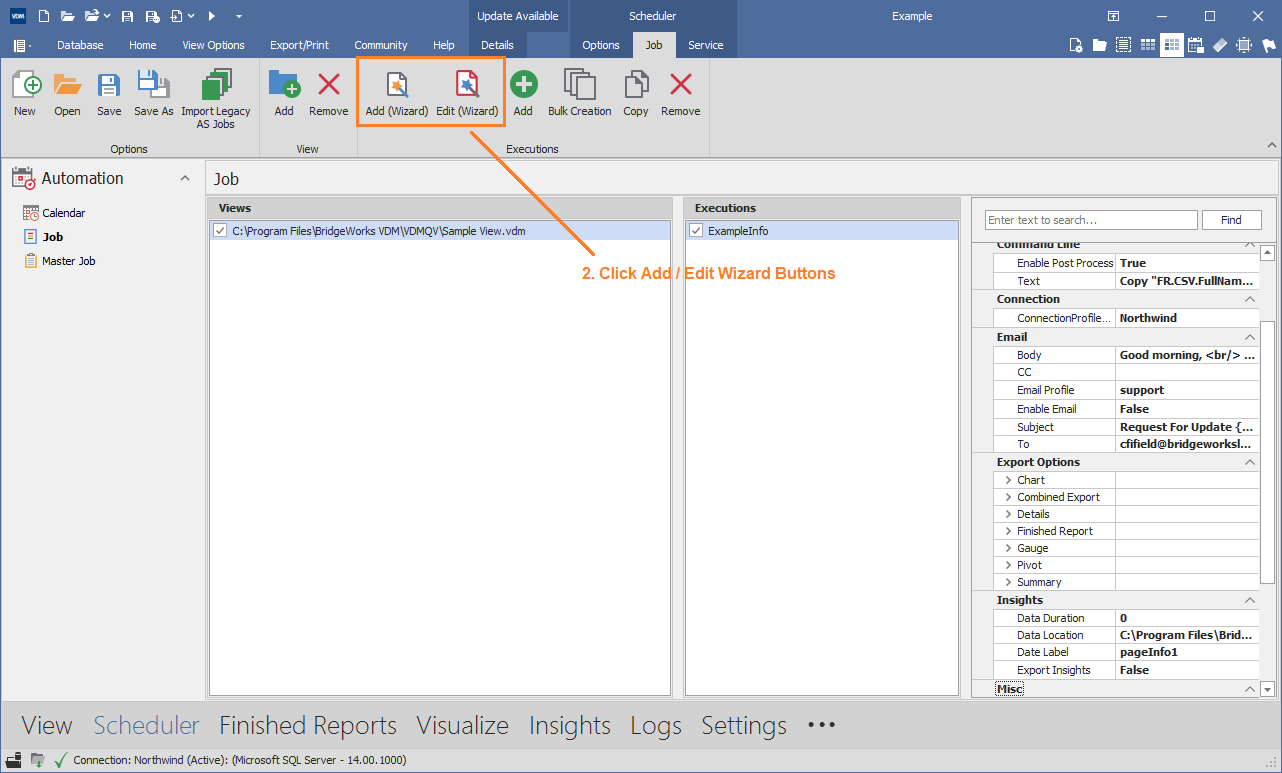
2. Open / Create a Job and then click Edit (Wizard) / Add (Wizard).
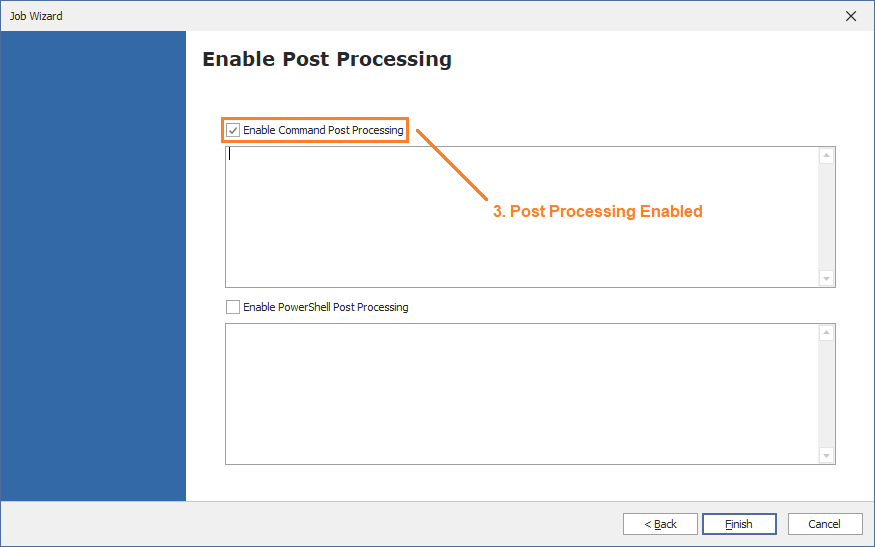
3. Enable Command Post Processing.
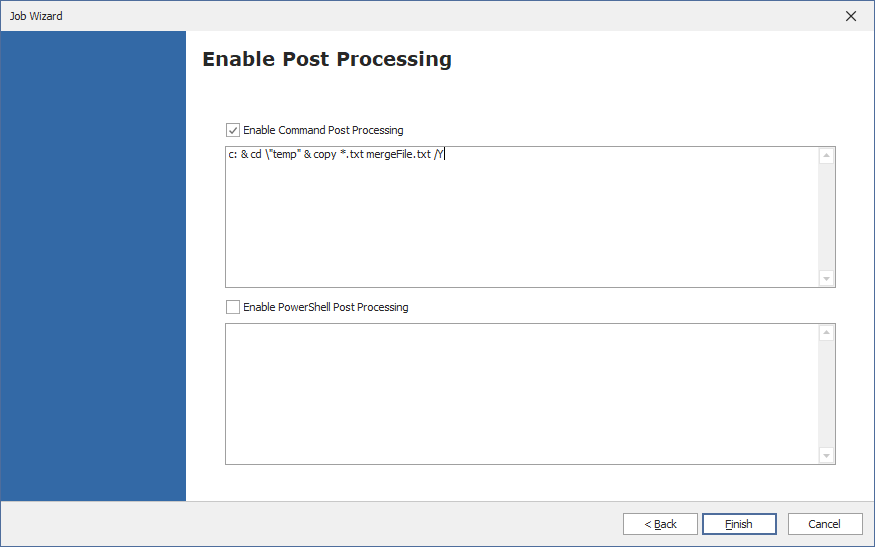
4. (Key Step) Enter your post processing commands separated by an ampersand ( & ) before each new argument.
Example: c: & cd \"temp" & copy *.txt mergeFile.txt /Y
How To Send Multiple PowerShell Commands.
(Key Step: 4) Post Processing requires an in-line command and doesn't observe <cr>. To accomplish this with PowerShell command, add a semicolon ; between each command (each line is separated by a semicolon, and escape the quotes and take them from " to """).
1. Click on the Job located in the Scheduler section of VDM's main ribbon bar.
2. Open / Create a Job and then click Edit (Wizard) / Add (Wizard).
3. Enable PowerShell Post Processing.
4. (Key Step) Enter your post processing commands separated by an ampersand ( & ) before each new argument.
Example Powershell Script: Change Exported File's Name
$OrigFile = [System.String]::Concat("""C:\temp\YourFileName""",(Get-Date).ToString("""MMddyyyy"""),""".pdf""");$NewFile = [System.String]::Concat("""C:\temp\YourFileName""",(Get-Date).AddDays(-1).ToString("""MMddyyyy"""),""".pdf""");Rename-Item -Path $OrigFile -NewName $NewFile
$OrigFile = [System.String]::Concat("""C:\temp\YourFileName""",(Get-Date).ToString("""MMddyyyy"""),""".pdf""");$NewFile = [System.String]::Concat("""C:\temp\YourFileName""",(Get-Date).AddDays(-1).ToString("""MMddyyyy"""),""".pdf""");Rename-Item -Path $OrigFile -NewName $NewFile
Example Command Broken Up:
Line1:
$OrigFile = [System.String]::Concat("""C:\temp\YourFileName""",(Get-Date).ToString("""MMddyyyy"""),""".pdf""")
Line2:
;$NewFile = [System.String]::Concat("""C:\temp\YourFileName""",(Get-Date).AddDays(-1).ToString("""MMddyyyy"""),""".pdf""")
Line3:
;Rename-Item -Path $OrigFile -NewName $NewFile
Comments
0 comments
Please sign in to leave a comment.